|
How to create your own deep learning analytic to detect age groups! |
|
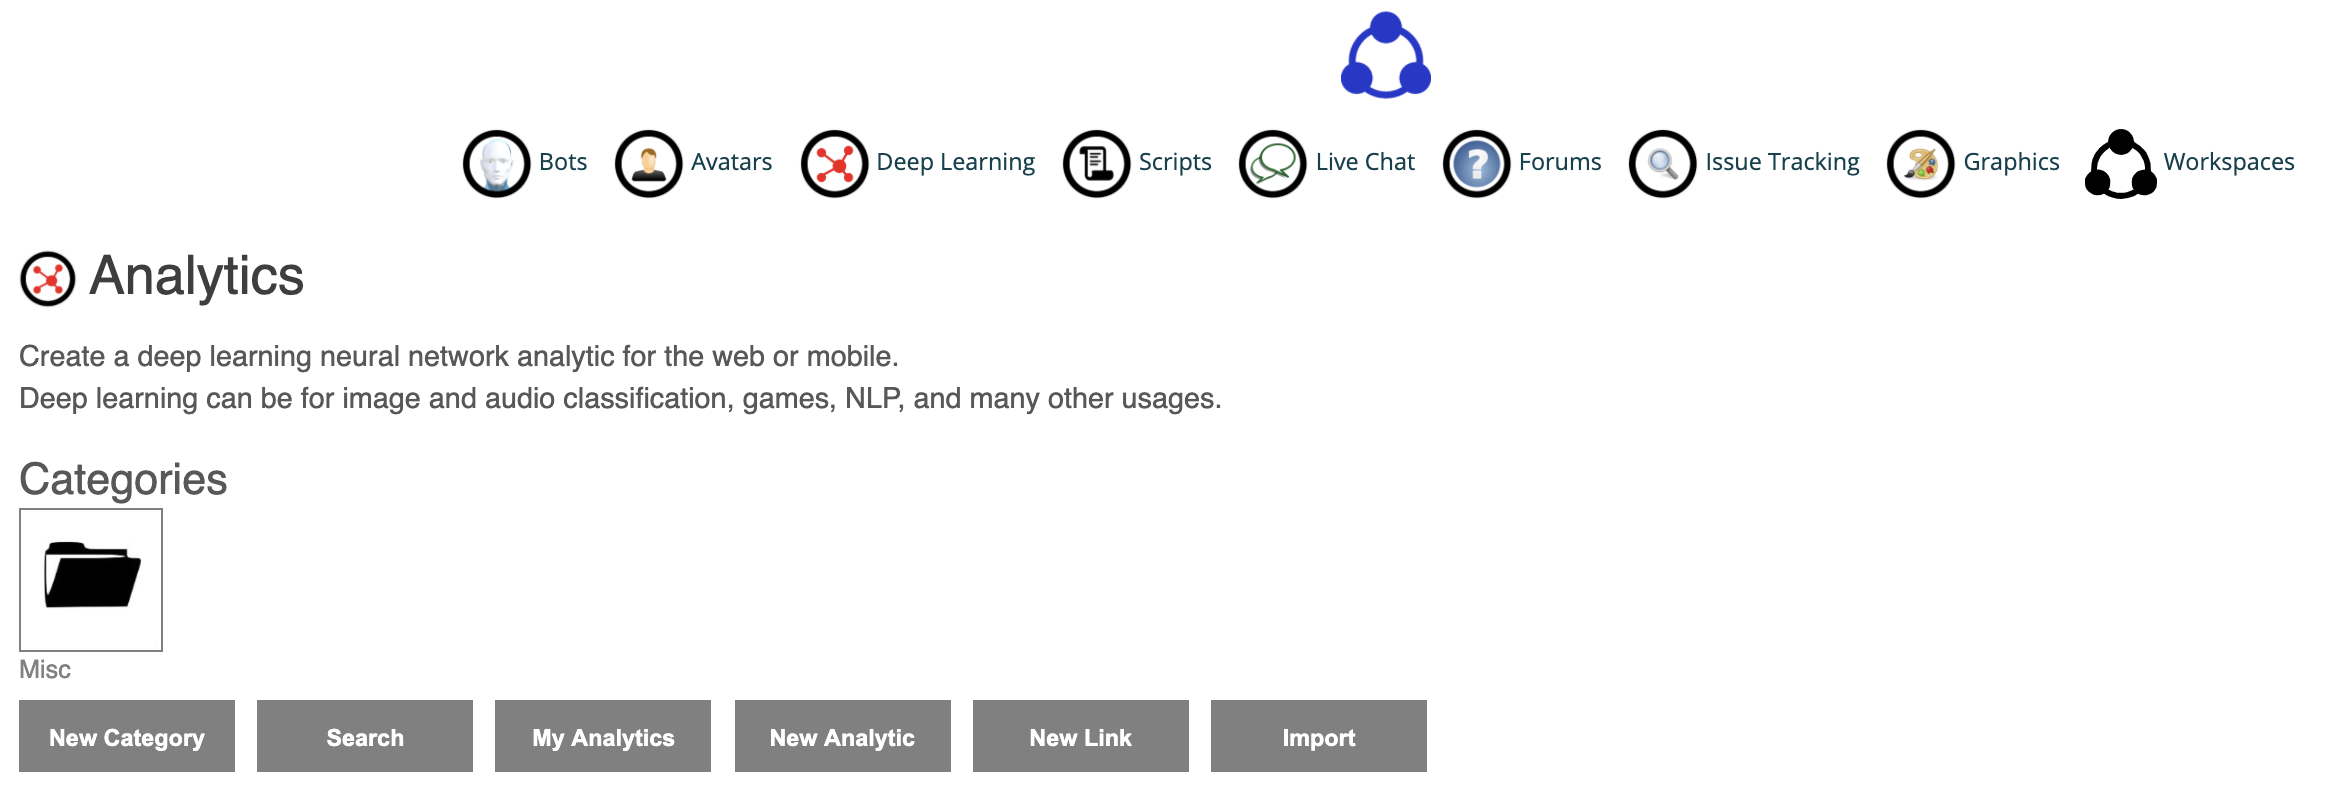
Getting Started Deep learning analytics apply artificial intelligence to a lot of problems like classifying images, recognizing speech or faces, performing NLP functions, playing games, and analyzing data. To create your own deep learning analytic, first head to Bot Libre or Bot Libre for Business. Start by navigating to the Deep Learning page once you've signed in, or create a new account.
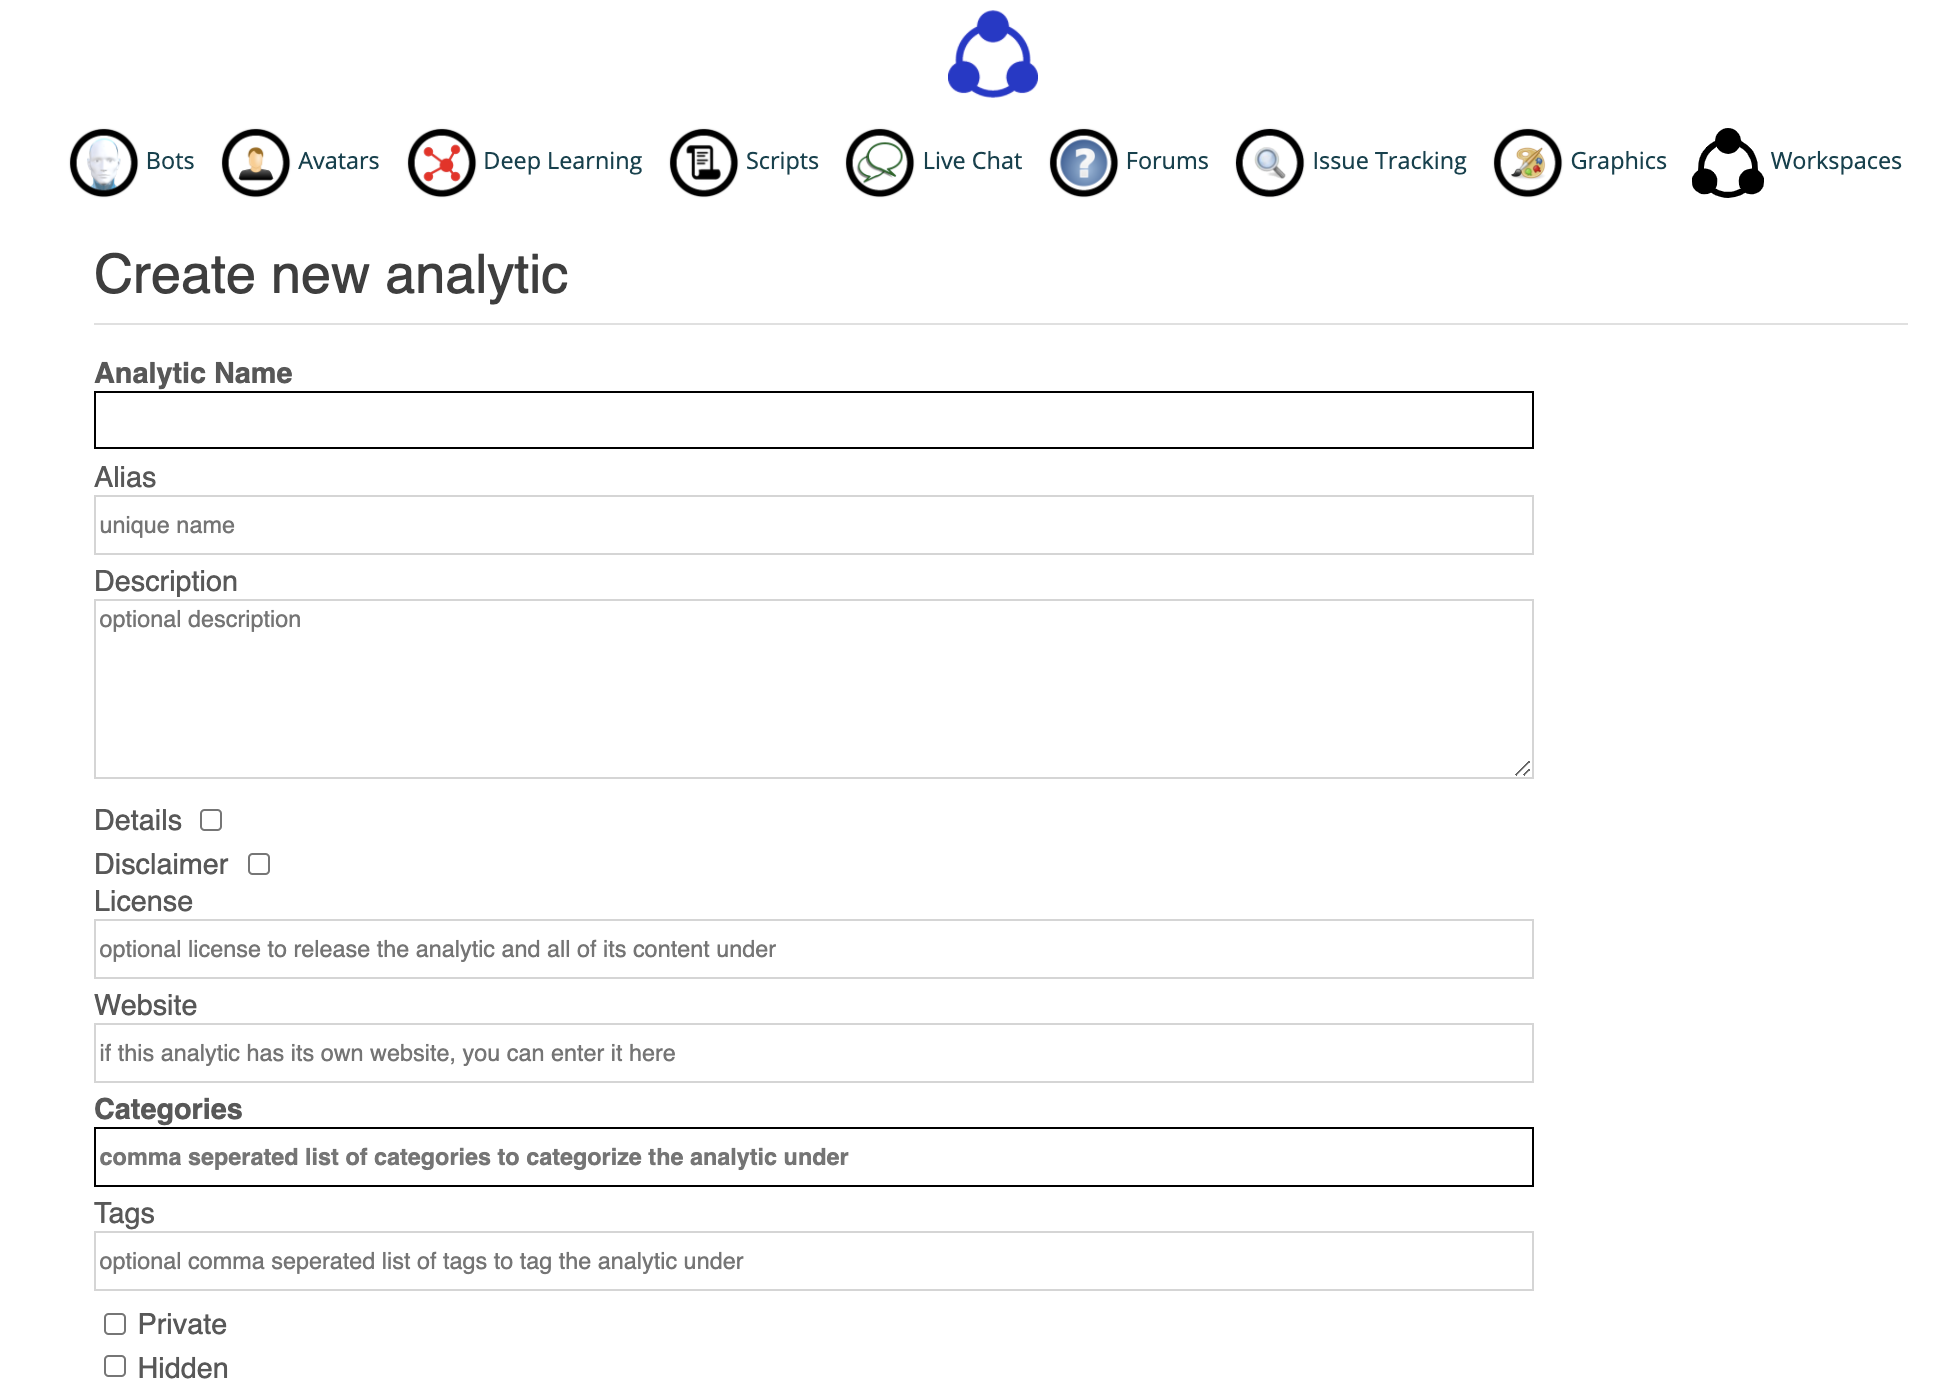
Next, click on "New Analytic", and give your analytic a name. If you're interested feel free to customize you're analytic here, although everything other than a name is optional.
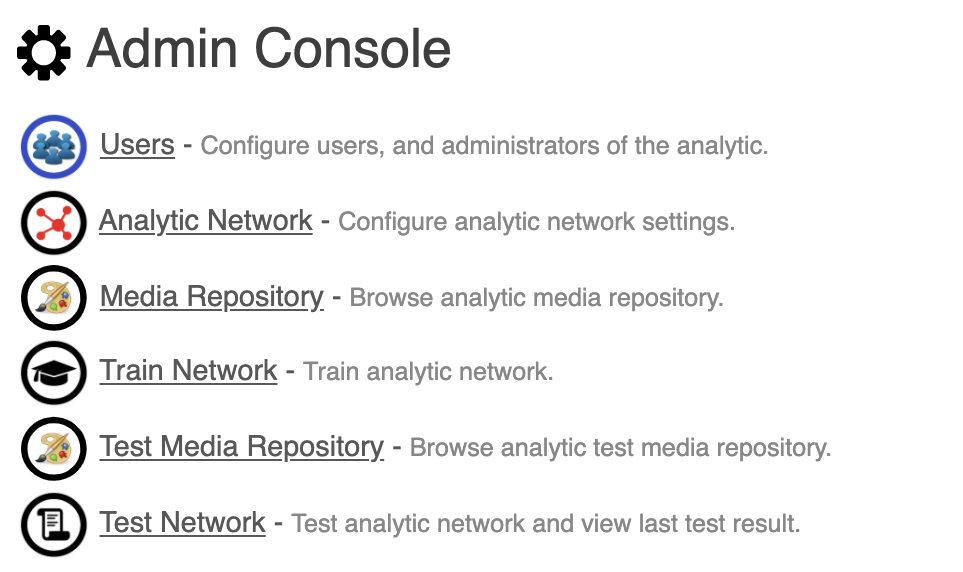
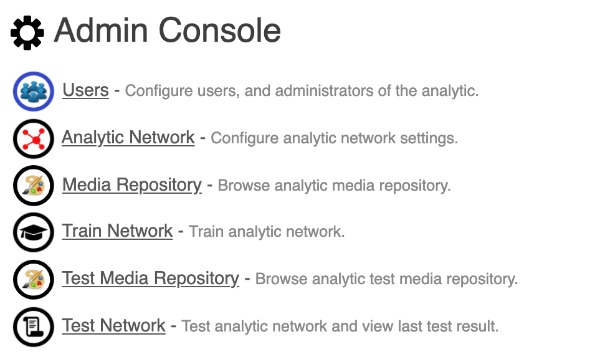
Once you've done that enter your analytic's admin console through the gear icon. You may need to click your bot first. Training the Analytic
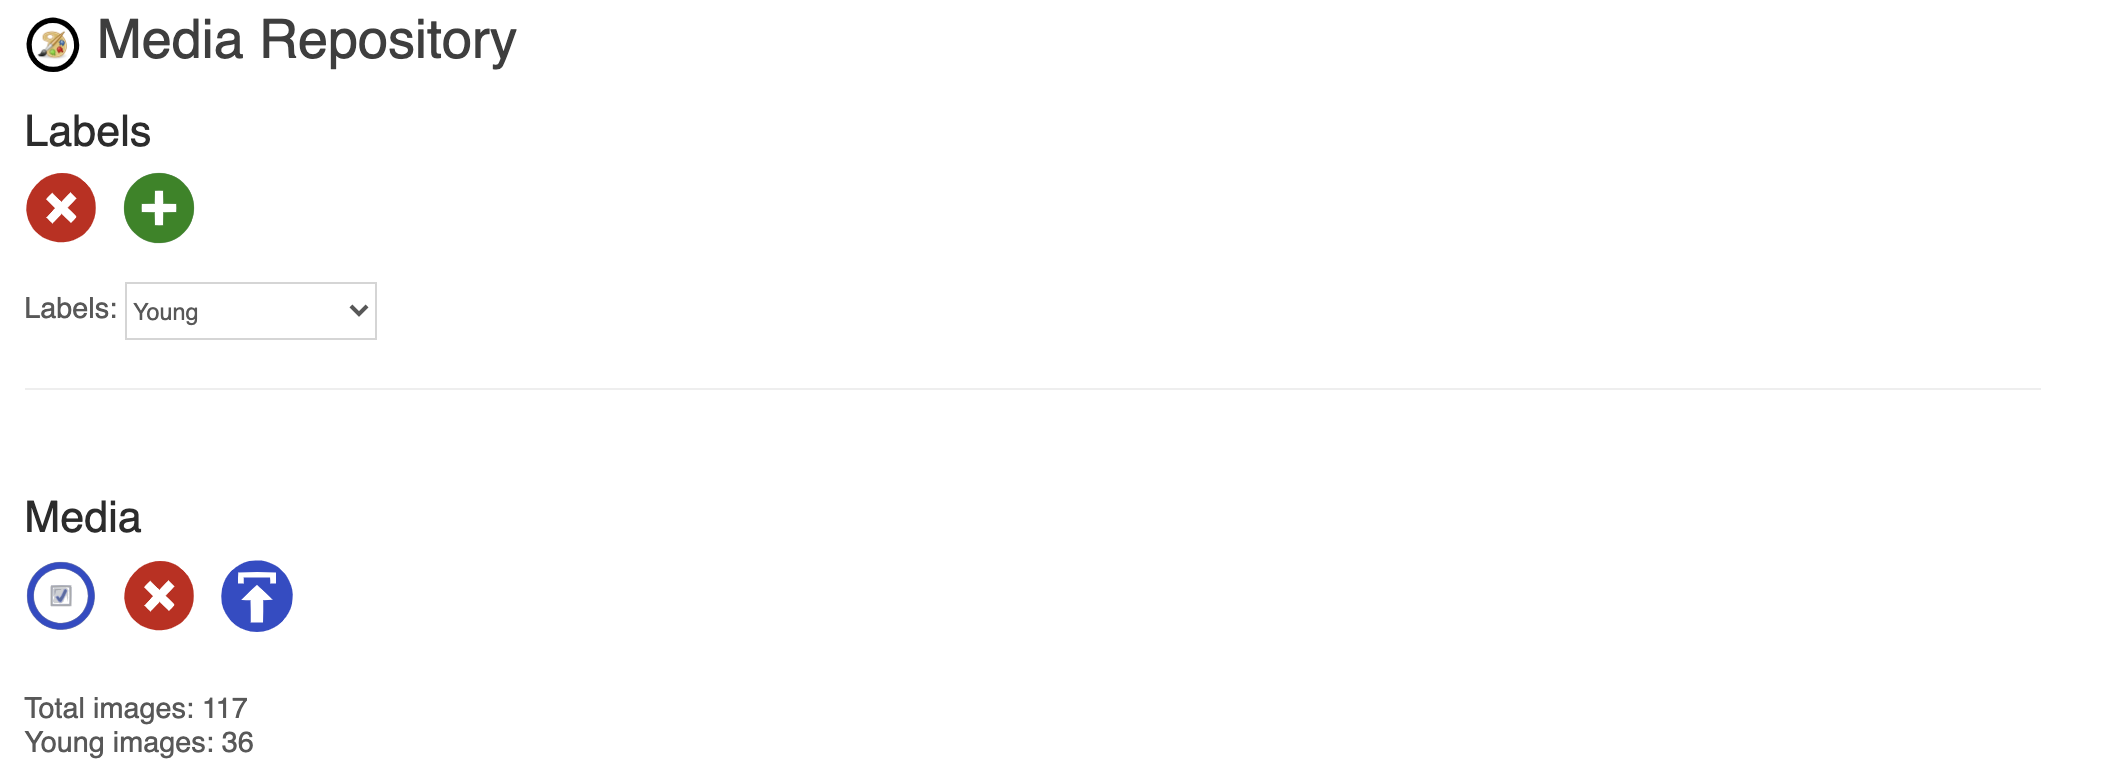
Now we have to upload the data our analytic will use to train. This tutorial will focus on an age detection analytic but we will try to keep it general. First, we have to decide which labels our analytic will use to categorize images. In our case this will be "Young", "Middle Age", and "Old". Second, find clear images that conform to that category. If you don't have your own data, a good source for these are google images. Try to get 30-40 in each category. The trade-off here is, the more images you upload the better the result (up to a point), but the longer it will take to train. Third, click the green plus button beside the "Labels" header to create a new label. For each label use the blue upload button below the "Media" header to upload your images.
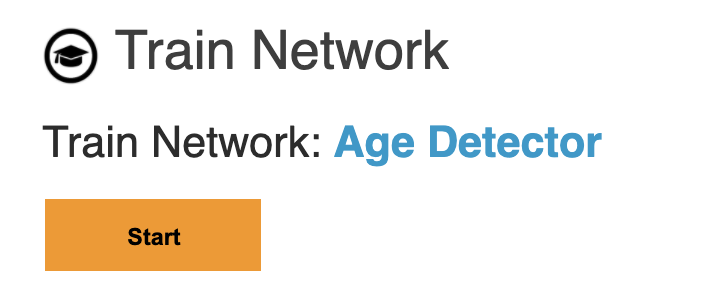
Once you're done, go back to your admin console via the gear icon in the top left.
Select "Train Network" and click the "Start" button to begin training the analytic. Depending on the number of images this may take a few minutes.
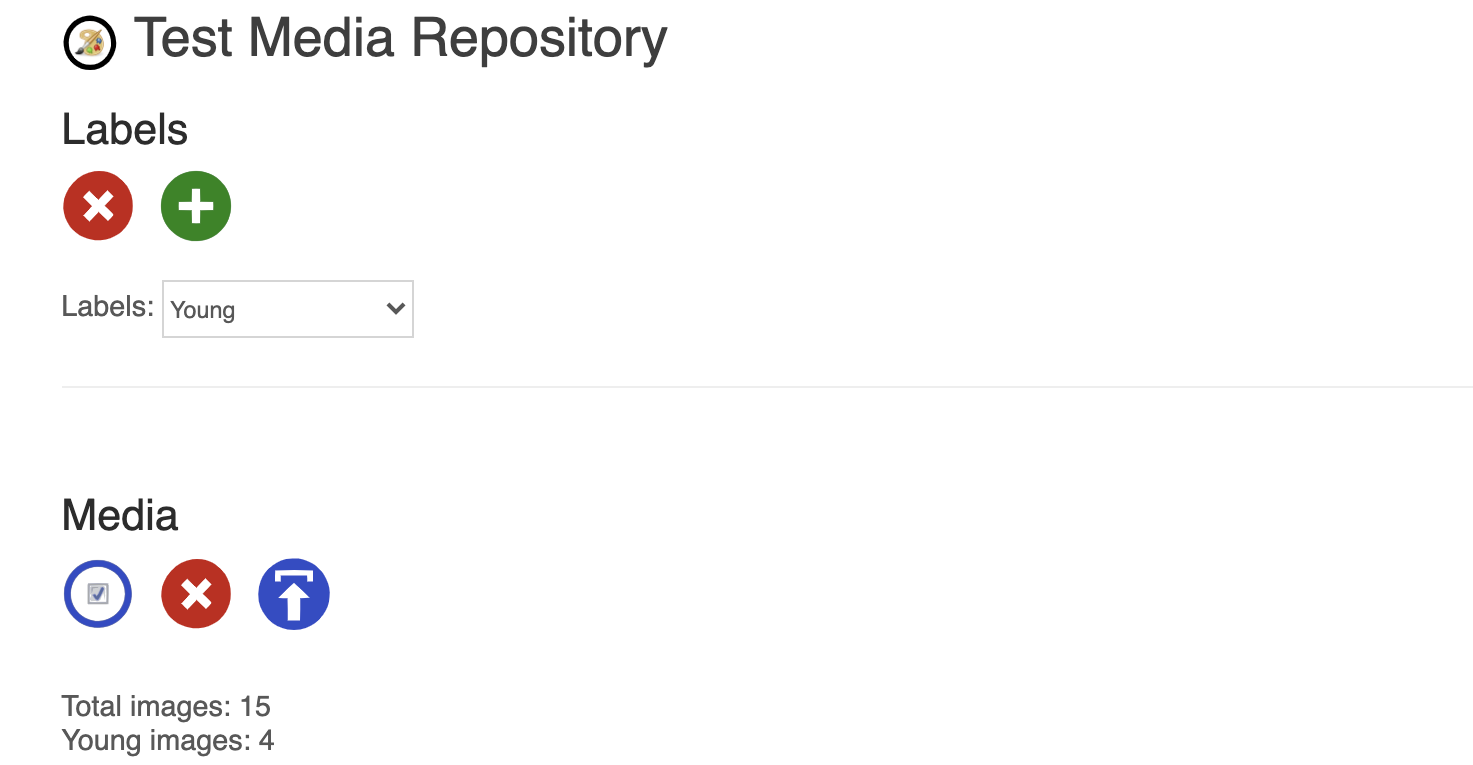
Testing the Analytic Once you're finished training, let's test its accuracy. Navigate back the the admin console via the gear icon in the top left corner and select the "Test Media Repository" button.
Then, follow the same procedure as we did for uploading training images making sure we use the same category labels. The only difference is we only need about 10-20 images per category. More is better but thats up to you.
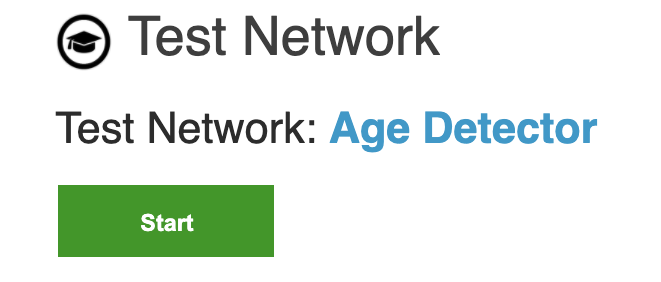
Finally, navigate back to the admin console through the gear icon in the top left. Select "Test Network" and click the "Start" button.
We're Done! We're finished! If you notice your analytic is making too many mistakes, here are a couple common solutions. Try:
|
|
|
|
|
|
|